
A Brass Elbow fitting changes the direction of a pipe while helping maintain a secure connection. Choosing one involves more than matching its size. The angle, thread type, material grade, and operating limits all affect whether it suits the job. A fitting that looks right on the workbench may still fail to match the system.
Start with the pipe dimensions and connection details. Check whether the threads are male or female, and confirm their standard rather than relying on appearance. Then consider the fluid, temperature, and pressure. Brass grades can vary, and not every fitting is suitable for every environment. Small details matter. A mismatch can cause leaks, damaged threads, or difficult maintenance.
Installation deserves equal attention. A dry fit can reveal alignment problems before tools come out. Avoid forcing the connection or overtightening it; either can damage threads or compromise a seal. Follow the fitting manufacturer’s guidance, use compatible sealing materials, and inspect the completed joint under normal operating conditions. For drinking-water or other specialized systems, verify that the product is specifically rated for that use. It is tempting to choose the cheapest elbow that fits. That shortcut may not be the best value. This guide explains how to compare key specifications and select a Brass Elbow fitting with greater confidence, while recognizing that a product label alone cannot replace checking your system’s requirements.
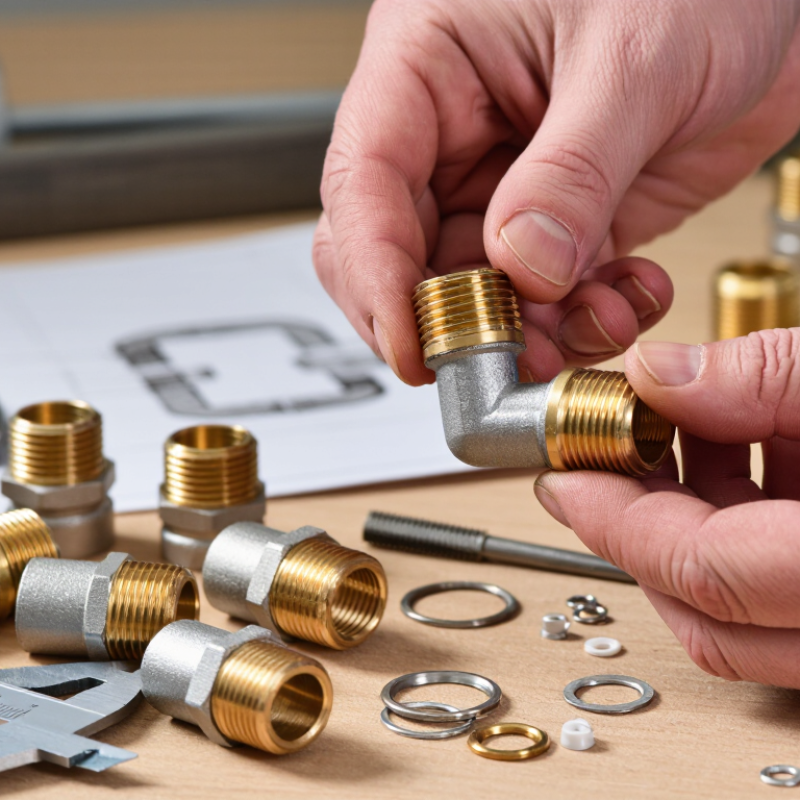
A 45° brass elbow creates a gentler change in direction. It can suit a route that bends gradually around a cabinet edge or machine frame. A 90° elbow makes a sharper turn and can help when pipes must run along two walls. Check the actual space before choosing. A fitting that looks compact on paper may leave little room for a wrench.
Angle also affects how the pipe route meets nearby components. A tight 90° bend may be convenient, but the full system layout matters; flow resistance depends on factors such as pipe size, flow rate, and other fittings. Measure the centerline route and check clearance for installation and future access. I have seen neat-looking layouts become awkward once insulation or a valve is added. It is easy to overlook that.
Tips: Hold a simple sketch against the installation area. Confirm the fitting size, thread type, and material compatibility. Leave enough room to tighten the connection without twisting the pipe.
Choose the angle that follows the route without forcing the pipe into alignment. If a 45° elbow needs extra fittings to complete the turn, compare that arrangement with one 90° elbow. More joints can mean more places to inspect for leaks. Still, the best choice is not always obvious from the angle alone; verify the fitting specifications and the system requirements before installation.
Match Nominal Size and NPT Threads per ASME B1.20.1
Start by matching the elbow’s nominal pipe size to the connected pipe or port. Nominal size is a designation, not a direct measurement of the fitting’s outside diameter. For example, a 1/2-inch NPT thread measures larger than 1/2 inch across its widest points. Check the fitting description and the equipment documentation rather than relying on a ruler alone.
Then confirm that both sides use the same thread type. ASME B1.20.1 covers NPT thread dimensions and gauging; NPT threads taper, so they tighten as the male and female threads engage. A mismatched size or thread can feel tight at first, yet still leak or damage the connection. Inspect the threads for dents and debris, and start the fitting by hand. It should turn smoothly for several rotations. I’ve seen rushed installations skip this check; it is an easy step to regret. Avoid forcing the elbow with a wrench, since brass can deform.
Tips: Verify the nominal size and NPT designation on both connection points. Use a suitable thread sealant when specified, and follow the equipment maker’s tightening guidance. Stop if the fitting binds early. Recheck alignment before applying pressure.
Before choosing a brass elbow, ask for its alloy designation and material certificate. Copper Development Association data lists C36000 brass as 60–63% copper and 2.5–3.7% lead. That composition is useful context, not a universal recipe for fittings. Color proves little. Match the stated alloy to the fluid, temperature, pressure, and any drinking-water requirements. A bright, clean surface cannot confirm what is inside the metal.
Check the finished-product specification separately from the alloy. ASTM B16/B16M covers free-cutting brass rod, bar, and shapes; it does not, by itself, qualify a completed elbow. Where its scope matches, ASME B16.15 covers cast-bronze threaded fittings. Confirm the document also addresses the elbow’s connection type, dimensions, pressure rating, and test requirements. Ask the supplier to link the certificate to the shipment, then compare its heat or lot number with the marking. Still, paperwork can be wrong. A simple receiving check—thread gauge, caliper, and visual inspection—can catch mismatches, but it cannot replace material verification. If the specification is unclear, pause before installation.
When choosing a brass elbow, confirm that ASME B16.15 applies to its construction and connection. The standard covers cast copper-alloy threaded fittings in Classes 125 and 250. A wrought fitting may fall under a different standard. Check the material and thread type, not just the product description.
Class 125 and Class 250 are designations, not guaranteed working pressures in psi. ASME B16.15 provides pressure-temperature rating data; compare the applicable rating with your system’s design pressure and operating temperature. Higher temperature can reduce allowable pressure. Check both values together. Also review the standard’s dimensions and marking requirements against the fitting documentation. A pressure test alone does not confirm that the fitting meets every standard requirement.
In practice, inspect the elbow’s class marking, thread condition, and material certificate before installation. A clean, undamaged thread matters; even a small nick can complicate sealing. If a supplier lists only “250,” ask for the applicable pressure-temperature rating and standard edition. This is easy to overlook. ASME B16.15 is the primary technical reference here, but the system designer must still confirm suitability for the service conditions. I would not select by class number alone; that shortcut can leave important details unchecked.
| Selection factor | What to check | Class 125 considerations | Class 250 considerations |
|---|---|---|---|
| Applicable standard | Confirm that the fitting is within the scope of ASME B16.15, which covers cast copper-alloy threaded fittings in these classes. Check the specified standard edition and purchase documents. | Select only when the design specification and the fitting’s documented rating permit Class 125. | Select only when Class 250 is specified or required by the documented design conditions. |
| Meaning of the class | The class designation is not, by itself, a pressure rating in psi. Do not interpret “125” or “250” as the fitting’s allowable working pressure. | Use the applicable pressure–temperature rating for the fitting material and service conditions. | Do not assume it is suitable for 250 psi; verify the applicable rating and temperature limits. |
| Pressure and temperature | Compare the system’s design pressure and temperature with the fitting’s published pressure–temperature rating. Account for the weakest component in the assembled system. | May be suitable where its documented rating meets the design conditions; confirm the rating at the actual operating temperature. | May offer a higher class designation, but the allowable conditions still depend on the material, temperature, and applicable standard requirements. |
| Material and service compatibility | Verify the exact copper-alloy grade, fluid compatibility, corrosion conditions, and any project or code requirements. “Brass” is a broad material description and does not alone establish B16.15 compliance. | Confirm that the particular alloy and fitting construction are rated for the fluid and service environment. | The higher class designation does not make an incompatible alloy suitable for the service. |
| Thread type and size | Check nominal pipe size, thread type, and mating-part compatibility. Where NPT is specified, confirm the required thread standard and use an appropriate sealing method for the application. | Match the fitting’s size and thread details to the connected pipe or component. | Apply the same size and thread checks; do not assume class designation changes thread compatibility. |
| Elbow geometry | Specify the required change of direction, end configuration, and available installation space. Confirm dimensions against the applicable standard or approved product drawing. | Choose the required elbow pattern and verify its dimensions for the installation. | Verify the selected pattern and dimensions independently; the class designation alone does not identify the geometry. |
| Documentation and final approval | Request documentation identifying the standard, class, material, size, thread details, and applicable rating. Have the selection reviewed against the project specification and governing code. | Accept only when documentation confirms the fitting meets the specified design requirements. | Accept only when documentation confirms the class, material, and rating are appropriate for the service. |
Selection note: Always use the applicable edition of ASME B16.15 and the fitting manufacturer’s documented pressure–temperature ratings. Class number alone is not a substitute for engineering review.
A brass elbow can look substantial on a workbench, yet its pressure rating depends on its size, construction, and operating temperature. Check the fitting’s published pressure–temperature table, not just the maximum pressure stamped on a package. Ratings often decrease as temperature rises. Small details matter. Include expected pressure surges, startup conditions, and the hottest point in the line. A system running near its limit may need a different fitting, even if its normal readings seem safe.
Next, confirm that the brass alloy and any seals or thread compounds suit the conveyed fluid. Brass is used in many water and air systems, but it is not compatible with every medium. Ammonia-containing fluids and some aggressive waters can damage certain brass alloys; compatibility varies with concentration, temperature, and exposure time. Check technical data for the exact fluid and fitting materials. If the information is unclear, ask the supplier or a qualified engineer before installation. I have seen compatibility treated as an afterthought; it is easy to miss, and costly to correct.
Use this chart as a general compatibility screening guide—not as a product rating. Actual suitability depends on the brass alloy, fluid chemistry, concentration, temperature, and operating conditions.
How to interpret: Higher scores indicate generally better compatibility for typical brass; lower scores indicate greater concern. Ammonia can cause cracking in copper alloys, while seawater and acidic solutions can increase corrosion risk. Before installation, confirm the fitting’s published pressure–temperature limits and media suitability for the exact alloy, connection, and seal. Ratings may need to be reduced at elevated temperatures.
476 Main Street - Route 28
Dennisport, MA 02639
Share On: