Choosing storm windows with screens means balancing weather protection, ventilation, visibility, and upkeep. The screen lets fresh air in while keeping insects out. The storm panel adds another layer over the existing window. But a screen is not a shield against severe wind or flying debris. That distinction matters.
The U.S. Department of Energy reports that heat gain and loss through windows account for about 25–30% of residential heating and cooling energy use. ENERGY STAR estimates that replacing single-pane windows with certified models can reduce household energy bills by about 12% on average nationwide. Those figures offer useful context, not a guarantee for every storm-window installation. Existing windows, local climate, installation quality, and household habits all affect results. A draft near the frame can undo some expected gains.
The right choice depends on the home, not just the product label. Compare screen materials, frame fit, panel operation, cleaning access, and compatibility with existing windows. Notice small details: Does the screen pull out easily? Can the panel be secured without blocking an escape route? The answers may differ by room. The following seven tips explain how to weigh these practical details, check product claims, and choose storm windows with screens that suit your home’s conditions. Some trade-offs remain; a more durable screen, for example, may be harder to see through.
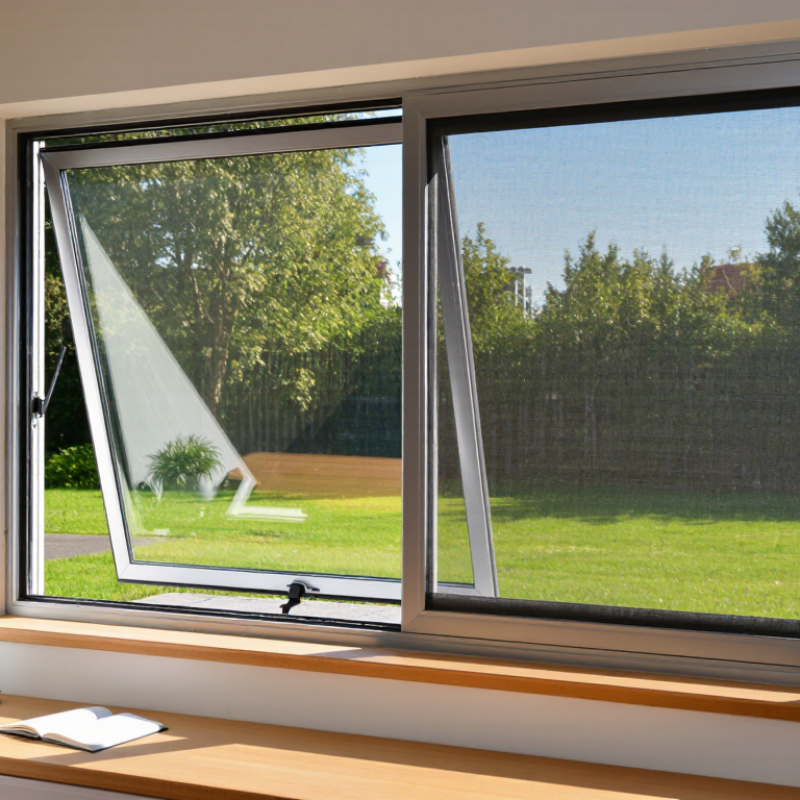
Storm windows with screens can help reduce drafts and keep rain from reaching the primary window. When the glass panel is open, the screen lets fresh air in while helping keep insects out. A screen itself does not provide storm protection, so choose a window system suited to the wind and weather your home faces.
Check that the existing frame is solid, then inspect the latches, corners, and weatherstripping. Small gaps matter. Fine mesh can block smaller insects, but it may also restrict airflow and collect dust more quickly.
Think about how you will use and maintain the panels. Measure each opening carefully, and check whether screens can be removed for cleaning without awkward tools. Look for secure fasteners and drainage paths that help condensation escape.
Airflow matters, too. A tighter mesh may feel right near a porch light, while a more open screen can suit a shaded room where breezes are limited. No single setup fits every window.
It is easy to focus on glass thickness and overlook routine cleaning; that trade-off is real. Choose a design you can inspect, operate, and keep in good condition.
Choosing storm windows with screens starts with the weather your home actually faces. In a cold, windy climate, look for tight seals and low-emissivity glazing to limit drafts and heat loss. The U.S. Department of Energy says low-e storm windows can reduce heating and cooling costs by 10–30%, depending on the home and climate. In humid or coastal areas, check frame materials and hardware for moisture and corrosion resistance. A screen is useful for ventilation, but it is not impact protection.
Next, inspect the existing windows before ordering. Look for soft or peeling wood, loose sashes, cracked glazing, and gaps that admit daylight. A storm window cannot fix a failing frame. Measure each opening; older homes often vary from window to window. I would double-check those measurements. It is easy to miss a slightly bowed frame.
Finally, consider exposure, not just regional climate. A sheltered porch and a wind-facing upper floor have different needs. NOAA’s 2023 U.S. disaster report recorded 28 weather and climate events with losses exceeding $1 billion each; local exposure still varies widely. Check local wind and flood-risk maps, then ask whether the assembly is rated for the hazards at your site. One easy-to-miss detail: confirm that the screen can be removed or cleaned without disturbing the storm panel.
Assess your climate, window condition, and storm exposure before choosing a product. The chart shows the minimum sustained wind speeds for tropical-storm strength and each Saffir–Simpson hurricane category.
Wind category alone does not determine the right window. Check local building requirements, the condition of existing windows, and the risk of wind-borne debris. Insect screens are not impact protection.
Frame material changes more than appearance. Aluminum is slim and resists moisture, but transfers heat readily. Wood insulates well and suits older trim, though it needs regular paint checks. Vinyl needs little upkeep, but confirm it fits tightly and operates smoothly. A loose frame can rattle on a windy night. DOE estimates windows account for about 25–30% of household heating and cooling energy use, so small fit details matter.
Compare glazing by climate and existing window condition. A low-e coating reflects heat while allowing daylight through; an air gap between panes can further slow heat transfer. The U.S. Department of Energy reports that low-e storm windows may reduce heating and cooling costs by 10–30%. Actual savings vary with air leakage, climate, and installation. I would not treat that range as a promise.
Window style determines how the screen works. Two-track units usually keep a fixed screen panel, while three-track designs let glass and screen sections slide independently. For frequent summer ventilation, check that the screen opens easily and can be removed for cleaning. Match the storm unit to the sash: a poorly aligned track can bind, even when the glazing is efficient. That detail is easy to miss.
| Tip | What to Compare | Practical Guidance | Best Fit |
|---|---|---|---|
| 1. Check the frame material | Aluminum, vinyl, and wood frames | Aluminum is lightweight and low-maintenance but can conduct heat. Vinyl generally needs little upkeep and does not corrode, though its performance depends on construction and climate. Wood can be painted and may suit historic homes, but it needs regular maintenance. | Choose based on upkeep, appearance, local weather, and compatibility with the existing window frame. |
| 2. Compare glazing options | Single glazing, insulating glazing, and low-emissivity (low-e) glass | Single glazing is a common, simple storm-window option. Some products offer insulating glass or low-e coatings; these can reduce heat transfer, but performance varies by product. Check published energy ratings and installation details. | Consider low-e glazing where reducing heat loss or solar heat gain is a priority. |
| 3. Match the style to your existing windows | Two-track, three-track, and fixed storm windows | Track designs can allow storm panels and screens to move or be removed for cleaning. Fixed units do not open and are generally unsuitable where regular ventilation is needed. Confirm how each panel operates before purchasing. | Choose an operable style if you want ventilation through the primary window. |
| 4. Inspect the screen arrangement | Integrated screens, removable screens, and screen-panel position | Check whether the screen can be removed for cleaning and whether it stays in place while the storm panels are operated. Screen mesh helps keep insects out while allowing airflow, but it is not a substitute for a secure window lock. | Look for accessible, replaceable screens if you expect frequent cleaning or seasonal changes. |
| 5. Measure for a tight fit | Opening dimensions, frame condition, and mounting clearance | Measure each opening according to the manufacturer’s instructions; older windows may not be perfectly square. A close, properly sealed fit helps limit drafts and water entry. Repair damaged wood or masonry before installation. | Useful for every home, especially older buildings with irregular openings. |
| 6. Review weather sealing and drainage | Gaskets, caulking details, weep openings, and installation method | Weather seals can help reduce air leakage. Follow the installation instructions so the assembly can drain as designed; blocking drainage openings may trap moisture. Avoid sealing over features the manufacturer identifies as drainage paths. | Important in wet or windy locations and wherever moisture could damage the existing frame. |
| 7. Consider cleaning, maintenance, and access | Panel removal, hardware, screen replacement, and access to the primary window | Confirm that panels can be cleaned safely and that the primary window remains accessible for operation and maintenance. Ask how replacement screens and parts are obtained, and check whether the assembly can be removed without damaging the existing trim. | Choose a design that suits your cleaning routine, window access, and long-term maintenance plans. |
Mesh count is a useful starting point, not a complete airflow rating. An 18 × 16 mesh has 288 nominal openings per square inch; a 20 × 20 mesh has 400. Finer mesh can help block smaller insects, but tighter spacing may reduce airflow and slightly soften the view. ASTM D3656/D3656M, the industry specification for insect screening, also considers factors such as wire diameter and strength. Those details matter: two screens with the same mesh count can feel different at an open window.
Match the screen to the room. A breezy kitchen may benefit from a more open mesh, while a bedroom near wet vegetation may need finer insect control. Hold a sample against daylight and look through it from several feet away. Dark mesh often appears less noticeable than bright mesh, though the frame and lighting affect visibility too. I would check twice before choosing by mesh count alone; I have seen that number treated like a promise of airflow, and it is not. Ask for the product’s open-area or airflow data, if available, and compare samples in the actual window opening.
No screen is perfect.
Measure the opening, not just the visible glass. Record width and height at the top, middle, and bottom; older frames are often out of square. Use the smallest measurements, then check the product’s required clearance. Also confirm that the frame leaves room for sash locks, operating tracks, and screen removal. A close fit matters. A rushed tape measure can mean a storm window that binds or leaks.
Check installation requirements before ordering. Some units attach to the exterior trim; others need a different mounting surface. Follow the specified fastening and sealing details, and keep drainage openings clear. The U.S. Department of Energy’s Energy Saver guidance estimates low-e storm windows can cut heating and cooling costs by about 10–30 percent, depending on the home and installation. Treat that as a range, not a promise. Existing window condition and local climate affect results.
Screens need attention, too. Confirm whether they fit inside the storm unit or require separate storage, and make sure you can remove them without damaging the frame. Inspect mesh, clips, and weep holes each season; clear grit with a soft brush and mild soap. The Association of Energy Efficiency of Storm Windows (AERC) evaluates storm-window energy performance, so look for verified ratings when comparing options. I’ve found the small details are easy to overlook. They matter later.
476 Main Street - Route 28
Dennisport, MA 02639
Share On: