Blog

7 Tips for Choosing Aluminum Storm Windows

Choosing the right aluminum storm windows can improve comfort, reduce drafts, and protect older windows during severe weather. However, attractive frames and low prices do not tell the whole story. A reliable choice depends on window measurements, frame condition, glass options, drainage, installation quality, and local climate.

In residential renovation work, small details often create the biggest difference. A loose track may rattle in strong wind. Poor drainage can leave water pooled along the sill. An accurate measurement, taken at several points, helps prevent these problems. It is also worth checking the window’s finish, fasteners, seals, and ventilation design before comparing brands. Quality aluminum storm windows should fit securely without blocking normal window operation.

Performance matters more than appearance alone. Look for clear product specifications, credible warranties, and installation guidance from established manufacturers. Energy ratings can help, but they should match the building’s existing windows and ventilation needs. A storm panel that seals tightly may improve comfort, yet an unsuitable design can trap moisture between layers.

Do not rush this decision.

The following seven tips explain what experienced homeowners and contractors commonly inspect before purchase. They also address practical concerns, including custom sizing, seasonal maintenance, noise reduction, and realistic energy savings. Some recommendations may require compromise. For example, a heavier frame can feel more durable but may reduce ease of removal. The best aluminum storm windows are not always the most expensive ones. They are the ones that fit the property, climate, budget, and maintenance habits with dependable results.
7 Tips for Choosing Aluminum Storm Windows

Define Your Window Needs and Local Weather Conditions

7 Tips for Choosing Aluminum Storm Windows

Define Your Window Needs and Local Weather Conditions

Choosing aluminum storm windows begins with the building, not the product brochure. Measure each opening, including depth, squareness, and existing frame damage. A loose fit can allow drafts, rain, and insects inside. It sounds basic. It is often missed.

Your local weather should guide the specification. The National Oceanic and Atmospheric Administration’s 1991–2020 Climate Normals show major differences in temperature, rainfall, and snowfall across U.S. regions. Coastal homes may need stronger water and wind resistance. Cold inland homes usually need better air sealing and thermal performance. Check local wind requirements, too. The Federal Emergency Management Agency recommends evaluating wind exposure, attachment quality, and water entry risks before retrofit work.

Look for published U-factor, solar heat gain coefficient, and air-leakage ratings. The National Fenestration Rating Council uses these measurements to compare window performance. Lower U-factor generally means less heat transfer. However, the lowest number is not automatically best. Excessive solar gain can overheat south-facing rooms. The U.S. Department of Energy estimates that windows can account for 25–30% of residential heating and cooling energy use, so small performance differences may matter.

Aluminum frames are durable and slim, but metal conducts heat quickly. Thermal breaks and careful installation deserve attention. Ask whether the window includes drainage paths and replaceable seals. I would not trust a perfect rating if the frame is warped or the installer skips perimeter sealing. Local experience matters more than polished claims.

Compare Aluminum Frame Types, Glass Options, and Insulation Features

7 Tips for Choosing Aluminum Storm Windows

Compare frame types before comparing prices. Standard aluminum frames are light, durable, and economical. Thermally broken frames include an insulating barrier between indoor and outdoor metal. They reduce heat transfer more effectively. Check the frame depth, drainage channels, and corner joints. Weak joints can admit water during wind-driven rain. Ask for tested air-leakage and water-resistance results, not vague performance claims.

Choose glass according to your climate and room use. Single glass costs less, but double glass usually improves comfort near cold windows. Low-emissivity coatings can limit winter heat loss and summer heat gain. Clear glass may provide better daylight, while tinted glass reduces glare. Inspect the spacer material between panes. A poorly sealed edge can create fogging later. Small details matter.

Match insulation features to the existing window opening. Weatherstripping should compress evenly without making the sash difficult to operate. Look for firm locks, tight screens, and removable panels that can be cleaned safely. Measure the opening at several points, because older walls are rarely perfect. An installer should leave no visible gaps around the frame. I once saw a well-insulated unit perform poorly because the sill was uneven. That mistake is easy to miss. Consider maintenance too. Aluminum can last for years, but neglected drainage holes may still cause trouble.

Measure Existing Window Openings for a Proper Storm Window Fit

7 Tips for Choosing Aluminum Storm Windows

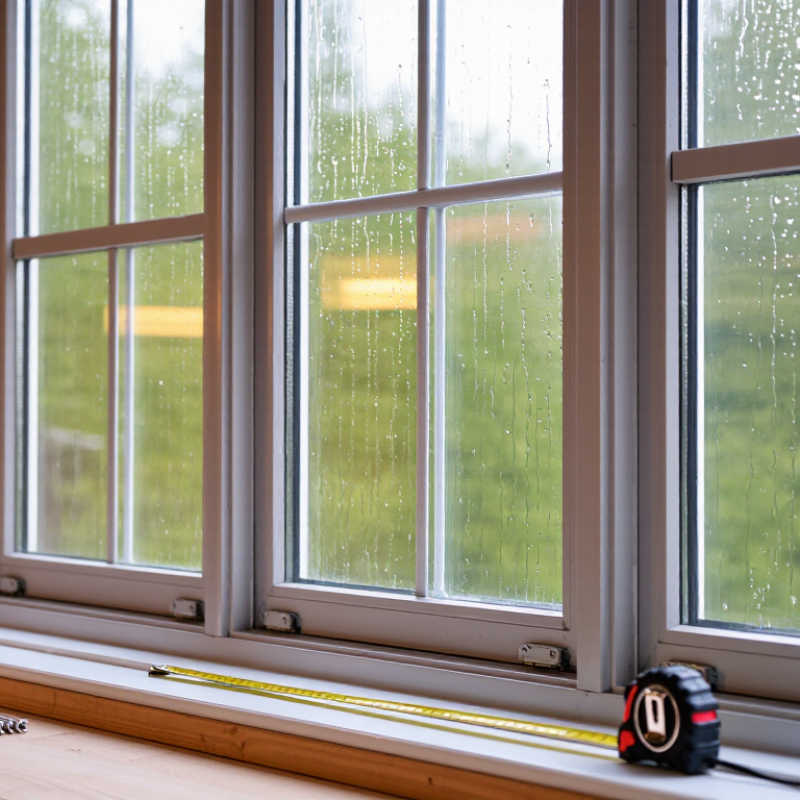
Tip 1: Measure the existing opening, not the old storm window. Use a steel tape for accuracy. Record width at the top, middle, and bottom. Measure height on the left, center, and right. Old frames can shift over time. Choose the smallest width and height measurements unless the installation guide states otherwise.

Tip 2: Check whether the opening is square. Measure both diagonals. A difference of more than a few millimeters may signal an uneven frame. Tip 3: Measure the depth of the exterior surface. Trim, screens, and window cranks can interfere with the storm window frame. Tip 4: Inspect the sill closely. Look for peeling paint, soft wood, gaps, or trapped moisture. A storm window cannot correct a damaged base.

Tip 5: Follow the manufacturer’s required clearance. Do not add extra space by guessing. Tip 6: Write every measurement clearly, including the date and location. This prevents mixing up similar windows. Tip 7: Recheck the numbers before ordering. I once recorded a basement opening incorrectly because I measured from the trim edge. The mistake was small, but the fit was not. Experienced installers often measure twice, then compare the notes. Aluminum frames need a stable, clean surface and enough room for secure fastening. A snug fit matters. Too tight can restrict movement, while too loose may allow drafts and rattling.

7 Tips for Choosing Aluminum Storm Windows - Measure Existing Window Openings for a Proper Storm Window Fit
Tip Measurement or Selection Dimension How to Measure or Evaluate It Why It Matters for Fit and Performance What to Record or Confirm
1 Opening width Measure the clear width between the side stops or mounting surfaces at the top, middle, and bottom of the existing window opening. Keep the tape level at each location. Older openings may be slightly out of square. Measuring only one location can result in a storm window that is too wide for part of the opening. Record all three widths in inches or millimeters. Use the smallest measurement when the installation instructions call for the opening size.
2 Opening height Measure from the bottom sill or mounting surface to the head at the left, center, and right. Keep the tape straight and parallel to the side jambs. Uneven sills and settling can create different heights across the opening, affecting panel operation and weather sealing. Record all three heights. Use the smallest height when the supplier specifies the minimum opening dimension.
3 Squareness and diagonal check Measure both diagonals from opposite corners. Compare the two readings; a larger difference indicates that the opening is out of square. A rectangular storm window may bind, leave gaps, or require corrective shimming if the opening is significantly out of square. Record both diagonal measurements and ask the installer or supplier about allowable variance before ordering.
4 Mounting depth and surface Check the flat, unobstructed surface where the storm-window frame will sit. Measure available depth and inspect for trim, screens, handles, protruding fasteners, and deteriorated wood. Aluminum frames need adequate bearing and clearance for secure fastening, panel movement, and a continuous seal. Record the available depth, surface width, and any obstructions. Confirm the required minimum depth for the selected installation style.
5 Frame type and operating clearance Identify whether the existing window is single-hung, double-hung, sliding, casement, fixed, or another configuration. Check that the storm panel will not interfere with sash locks, cranks, screens, or trim. Storm-window designs and attachment methods vary. The opening dimensions alone do not guarantee that the panels can be installed or operated. Record the window style, moving parts, hardware locations, and the direction in which each sash or panel operates.
6 Material condition and drainage Inspect the sill, jambs, trim, and existing frame for rot, looseness, corrosion, cracked sealant, or blocked weep paths. Repair structural defects before installation. A storm window cannot compensate for a weak mounting surface or blocked drainage. Trapped water can damage the surrounding frame. Mark each repair area and verify that sill drainage and manufacturer-required weep openings will remain clear.
7 Ordering size and final verification Repeat the measurements with a rigid tape and note the measurement date, units, and installation method. Do not apply a standard deduction unless the product instructions specifically require one. Different aluminum storm-window systems use different frame profiles, mounting surfaces, and sizing rules. The supplier’s sizing chart determines the final order size. Submit the smallest required width and height, opening type, mounting depth, and any requested tolerance. Confirm the final size before fabrication.
Measurement rule: Measure each opening separately, even when several windows appear identical. Use a steel tape, measure to the nearest 1/8 inch when working in imperial units, and follow the selected product’s installation and sizing instructions for any required deductions.

Evaluate Installation Methods, Maintenance Needs, and Expected Lifespan

7 Tips for Choosing Aluminum Storm Windows

Choose the installation method around the building, not convenience. Exterior panels improve protection, while interior panels suit some historic openings. Measure width, height, and squareness at several points. Small gaps can defeat good glass. Check sill drainage and use corrosion-resistant fasteners, especially near salt air.

The U.S. Department of Energy reports that low-emissivity storm windows may reduce annual heating and cooling costs by 12–33% compared with clear, single-pane windows. That figure depends on climate and existing windows.

Select a low-e option when energy savings matter. Inspect frame coatings for scratches before installation. Aluminum needs little painting, but it still needs attention. Wash frames with mild soap, clear weep holes, and inspect gaskets each spring. Avoid harsh cleaners. They can damage finishes. Condensation between layers signals a failed seal, poor ventilation, or both. It should not be ignored. One overlooked detail is hardware tension; loose clips allow rattling and air leakage during storms.

Use the International Association of Certified Home Inspectors’ 15–20-year aluminum-window range as a cautious benchmark, not a promise. Storm-window life can be shorter near coasts or where water drains poorly. Keep installation records and note the original seal condition. A professional inspection is worthwhile when the opening is warped. Even careful estimates miss hidden rot. Replacement may be wiser than repeated repairs when seals, clips, and coatings fail together.

Review Energy Performance, Safety Features, and Total Purchase Cost

7 Tips for Choosing Aluminum Storm Windows

Review Energy Performance, Safety Features, and Total Purchase Cost

Choosing aluminum storm windows requires more than comparing frame prices. I once measured only the glass area and missed the deeper frame clearance. That mistake created extra installation work. Measure each opening, sill, and exterior trim carefully. Small differences matter.

Review the energy label, glass type, and air-leakage information. Look for tight seals and low-conductivity design details. Ask how the window performs in your climate, not only in laboratory conditions. A qualified installer can check the existing frame and explain likely heat loss. Energy savings vary with orientation, weather, and installation quality. The numbers may be less impressive than expected.

Safety deserves equal attention. Choose secure latches, stable screens, and glass that suits the room’s use. Confirm that emergency escape requirements remain available where necessary. Check drainage paths after installation. Water trapped behind a storm window can damage paint and wood. It happens.

Calculate the total purchase cost before approving the order. Include measuring, installation, fasteners, repairs, delivery, maintenance, and future removal. A cheaper unit may need more adjustments or replacement parts. Request a written estimate with labor and warranty terms separated. Compare several detailed quotes, rather than three headline prices. Aluminum can last well, but poor sealing or careless fitting reduces its value. Recheck the assumptions before signing.

Share by: